
CI/CD Pipeline in CloudRun
Hi guys, hope you doing well. Back after long time. I would like to start this article in a different way by giving a short explanation of what changes has been there on my life after the last article I wrote. (I had started to write a new article, but that never got completed hence I dropped it). So, the last update from my side was on 27th September 2021. Then I was a happy and struggling undergrad(still struggling but with a slow pace. Am i being lazy? :P). With this article being live today, I am a week away from my graduation. I also got my first job as Machine Learning Engineer at Docsumo. Thats a quick update, lets now talk about the real shit.
Firstly, I hope you are out from the freebies and been working in the real production environment where you are charged for printing hello world :D. What I mean is I hope you have a account in Google Cloud Services. If not, please create a new one before we can go forward. (Note: If you are a student, you get an additional $100 as a credit on top of $300 if you sign in using a student email.) If you already have a one, cool lets get started.
What is CI/CD?
You should have heard CI/CD if you have watched few videos or read some articles on DevOps. In a very simpler terms, CI/CD is a process that allows you to make changes in you project and with a single git push, the changes are integrated and the new version of the service gets deployed reflecting the changes. For this, we want few commands to run after the push is made. But where and how can we run these commands? Well, popular git repository hosting services like GitHub and GitLab provides functionalities to write scripts that gets exectuted after the push is made. You can define these command in .github/workflows/ and .gitlab-ci.yml. For this article, we will be considering github as it is more popular and widely used for hosting repository.
Creating a Service Account
There are a few things that you need to do on GCP before going to github actions. Firstly, create a service account in GCP with role of roles/run.admin or roles/editor. The process of creating the account is outside the scope of this article. I will provide the documentation link provided by Google on how you can do so here.
Created the account? Great, there is one final step you need to do before we go to github i.e. downloading the key for the service account. You need this key to authenticate to GCP while you are working in github. To download the key for the service account, you can follow the step below:
- Go to IAM & Admin
- Go to Service Accounts from the Sidebar.
- Choose the service account you just created.
- Go to Keys > Add Key
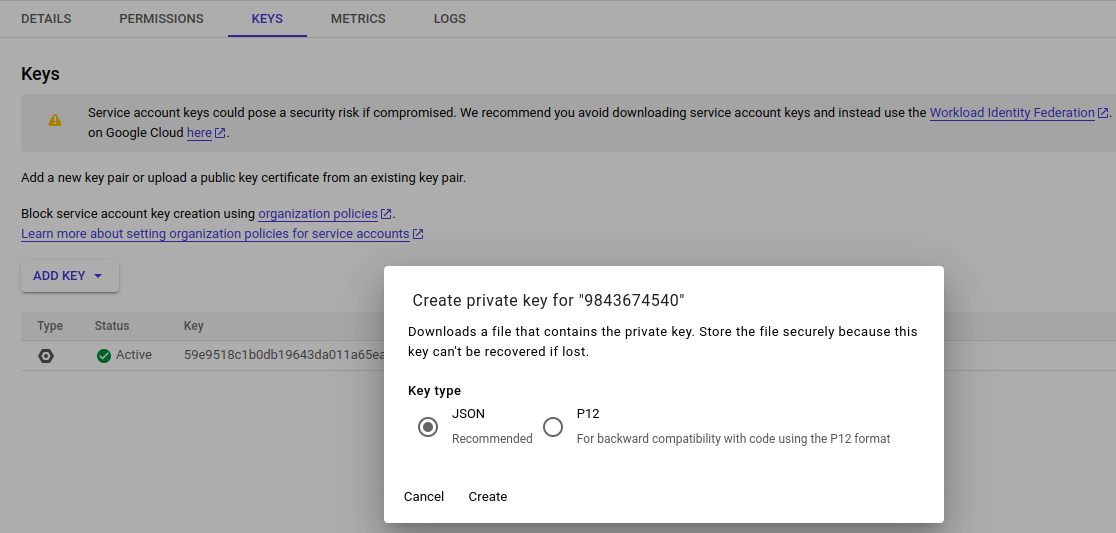
Note: Keep this key very secret
Going to Github
Create a repository in Github, you know how to create it? Cool, you are a smart person :D. To run some extra commands we discussed earlier, github provides something called Actions. You can run commands under a term called jobs. You can create multiples jobs and run multiple commands in different steps. This is exciting and I request you to get your hands dirty by exploring and running some actions on your own after you go through this article.
So, our prime focus is “We want a continuous deployment in CloudRun”. The steps involved in this process are:
- We push our code to github
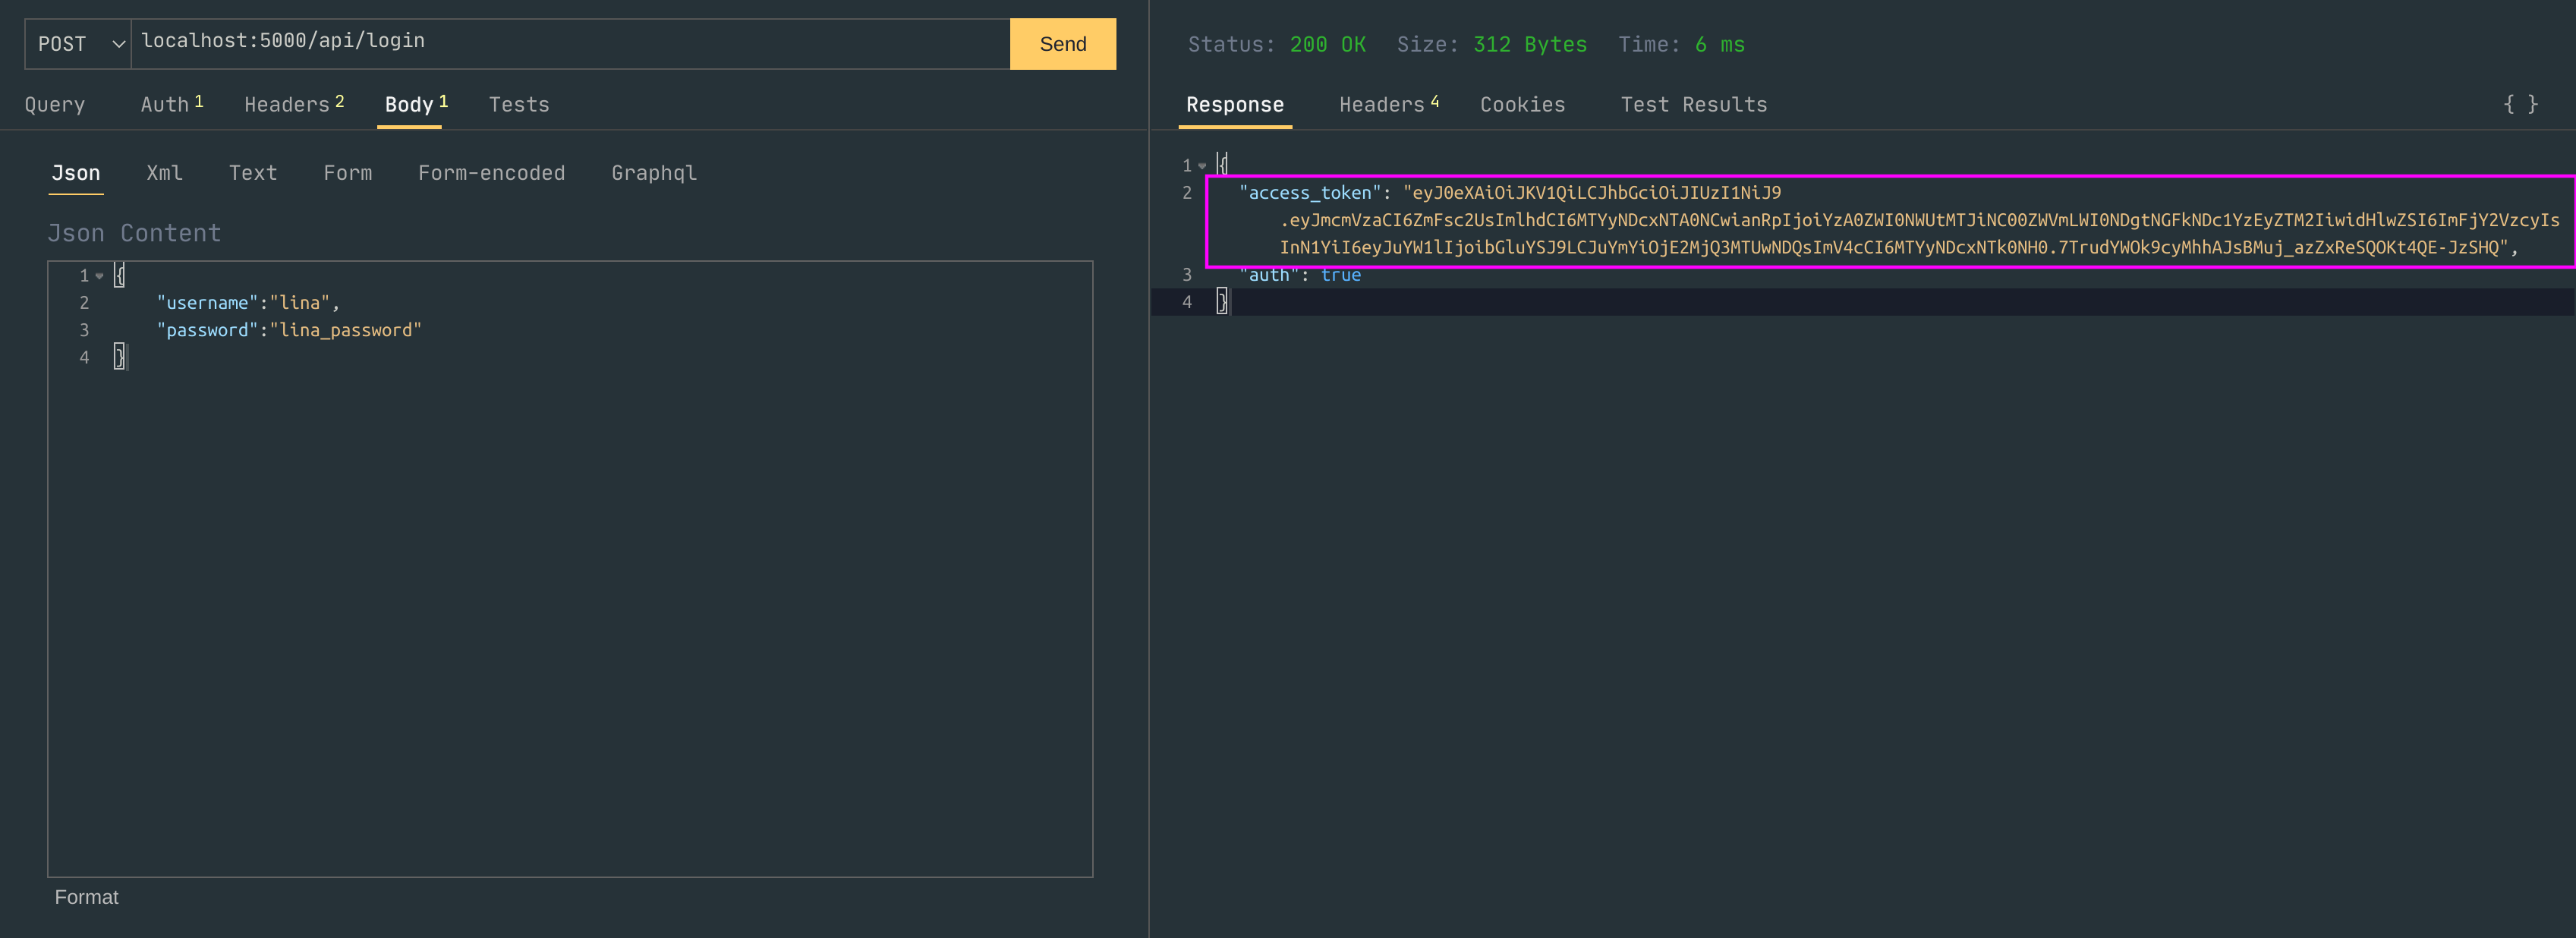
- Authenticating to GCP
- Creating a docker image for the code
- Pushing the image to container registry, we will be using one provided in GCP
- Running the command that deploys the image to cloud run
The exact steps will be reflected in the job that we will run github action.
Github Actions
To define a job, you need to create a .yaml file inside .github/workflows. Lets create a one we need to deploy our code to CloudRun.
name: CloudRun-GCP
env:
  PROJECT_NAME: demo-cloudrun
  REGION: us-central1

on:
  push:
    branches:
      - main
      - master

jobs:
  deploy:
    name: Deploy to CloudRun
    runs-on: ubuntu-latest

    steps:
      - name: Checkout the repo
        uses: actions/checkout@v3

      - name: Auth to GCloud
        id: 'auth'
        uses: 'google-github-actions/auth@v1'
        with:
          credentials_json: '${{ secrets.GCP_CREDENTIALS }}'

      - name: Set up Google Cloud SDK
        uses: google-github-actions/setup-gcloud@v1
        with:
          version: '>= 363.0.0'

      - name: Configure Docker
        run: |
          gcloud auth print-access-token | docker login -u oauth2accesstoken --password-stdin ${{ secrets.REGISTRY_URL }}

      - name: Build and Push Docker image
        run: |
          export IMAGE_NAME=${{ secrets.REGISTRY_URL }}/${{ secrets.GCP_ID }}/${{ env.PROJECT_NAME }}:${{ github.run_number }}-${{ github.sha }}
          docker build -t $IMAGE_NAME .
          docker push $IMAGE_NAME

      - name: Deploy to Cloud Run
        run: |
          export IMAGE_NAME=${{ secrets.REGISTRY_URL }}/${{ secrets.GCP_ID }}/${{ env.PROJECT_NAME }}:${{ github.run_number }}-${{ github.sha }}
          gcloud run deploy ${{ env.PROJECT_NAME }} --image $IMAGE_NAME --project ${{ secrets.GCP_ID }} --platform managed \--region ${{ env.REGION }} --allow-unauthenticated --memory=1Gi
So, you can see we have a job named as Deploy to CloudRun which run multiple commands in steps defined under it. The initial one is always to checkout to the repo, which basically means going into your repo. Then, in next few steps we authenticate to GCloud and configure container registry for our docker Images. Once the setup is done, we build the image, push it to container registry. Then, we run our last command that does the magic of pushing the image from container registry to CloudRun and deploys it there. The steps looks simple, right? Indeed, it is.
If you paid small attention to the .yaml file, you could have noticed I have used some variable inside double braces. These are the secret variables that github allows you to keep when you run a job. You can define secrets for your repo in: settings > Secrets and variables > Actions
There are three secrets we have used in the above .yaml file:
- GCP_CREDENTIALS: This contains the contents of json file you downloaded as a key for your service account.
- GCP_ID: You can find a key
project_idin the key json file. The value for this key is to be used for this secret. - REGISTRY_URL: This is the url for the container registry. For GCP, you can use
asia/eu/us.gcr.ioor simplygcr.io
Note: I kept the REGISTRY_URL as secrets. The reason is simple, in prod env, you don’t want people to know where you are keeping the images.
Create a simple server in in any language/framework you want. Also, create a Dockerfile that creates an image for the server. Now, everything is done and we are ready to push our code and see the application being deployed to CloudRun. You can find a simple Flask server with the Dockerfile in this repo.
Quick Tip: You can simply use stefda/action-cloud-run to reduce the steps in the action. But, I like this way of doing. The reason is simple, incase you plan to run action in your private VMs instead of github, the steps and process can be replicated.
Thats all guys. A working CI/CD pipeline is there. You can add more control on it by defining the branches you want to run this action. Also, you can chose the commit patterns to avoid running the action if the work is still in progress.
Some of you might be familiar with AWS instead of GCP and would have loved to learn it in AWS infrastructure. I am planning to write another article very soon that is based on AWS. Hope, I don’t lost my energy this time. Until then, Happy Learning!!


Comments